Sunday, April 26, 2020

Risotto ai funghi - Mushroom Risotto

There are innumerable recipes for risotto. The basics are
Use a short rice with high starch content.
Cook it very slowly.
Flavor well.
Easy, right? Well, yes!

It’s not like standard American rice that you measure the exact rice to liquid ratio, set the flame and leave. It takes your eye, judging when to add more liquid a little at a time. Still not difficult. I learned risotto from a sweet lady in the north of italy, where it’s commonly on the table. You can make risotto with just about anything. I love using any veg that i have just a couple cups left of...not enough for a side for my family but perfect for risotto! Just chop and sauté those veggies with a little onion, pair the type of broth you make (veg with veggies, for example) and proceed.

Making mushroom risotto:

Ingredients
2 cups carnaroli or Arborio rice (you can sub long-grain rice but it won’t be as creamy)
Mushrooms: 2 cups of mushrooms comprised of 8 Oz fresh mushrooms, chopped and/or 1 cup dried mushrooms, soaked in 2 cups hot water for 2 hours (save the liquid), chopped
1 small onion, chopped
2 cloves garlic, minced
Optional: 1/2 c small diced salami or prosciutto or ham
3 tbsp butter
3 tbsp olive oil
6 cups mushroom or veg broth (includes the mushroom liquid you made)
2 tbsp herbes de Provence OR 1 each of thyme and oregano
2 tsp salt
1/2 tsp pepper
Optional a pinch of red pepper flakes
Parsley, chopped

Finishing:
1/2 c Parmesan
1/4 c butter cut in 5 pieces

Put your broth in a saucepan and keep hot but not boiling.
In a large wide skillet sauté the onion in the olive oil and butter until soft. Add garlic and mushrooms and sauté on medium (if adding salami etc add it with the onions). Then increase heat to medium high and add rice. Stir and toast rice until you see a slight color change. Then reduce heat, level out the mixture flat in the pan and add enough broth until barely submerged. Add spices and mix in. Level out again and add more broth if needed. **If you have puddles your rice isn’t level so adjust it. Adding the broth is key. Rice should not be poking up above the broth line but broth should barely be covering it all. I use a 1/4 c ladle to add it.

Once it boils reduce the flame to barely above low...you want bubbles coming up but not many. I call it a tiny boil lol. DO NOT STIR your risotto. At all. The flame is low and you’ll add liquid gradually so it won’t burn. Every 2-3 minutes add a half cup of hot broth, drizzling it around the skillet. Don’t skip the edges. Rice is well packed in there so if you dump it in the center the other rice will burn.
Keep doing this for 20 minutes. Check by tasting your rice. It will likely have a bit of crunch still.

Start checking for doneness every 5 minutes. When it’s got just a hint of crunch add a ladle of liquid and then no more. Let it absorb most of the liquid, but when it’s still wet turn off the flame, add your Parmesan, parsley and 1/4 c butter and stir in. You’re done! Let the risotto sit for 10 min before serving.

You can serve this with more Parmesan, red pepper oil, and round out your yummy meal with a nice glass of Chardonnay, a fresh salad, maybe some broccoli rabe cooked with garlic and oil. Enjoy!


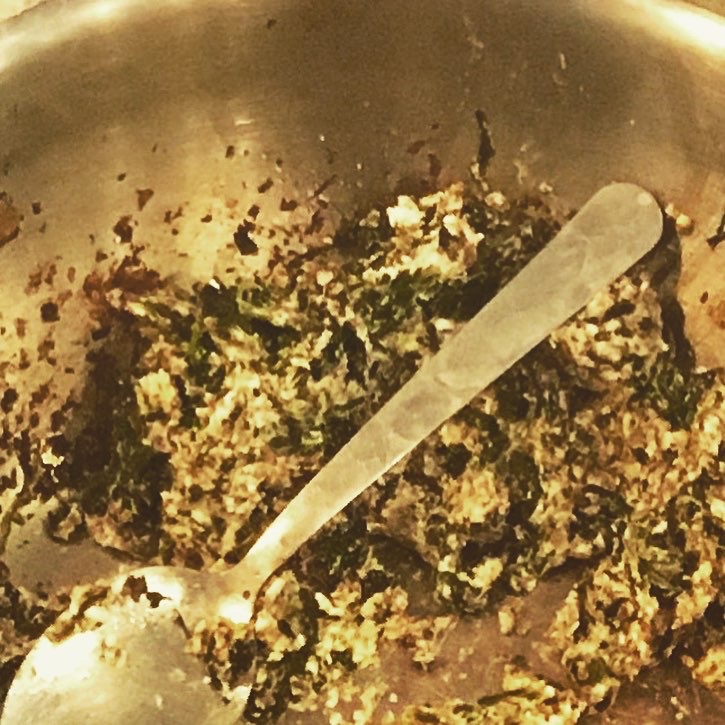
Note: while I didn’t take pics of the risotto i did take pics of what i did with the leftovers!
Butter a loaf pan. Line with parchment. Line with prosciutto. Mix 4 cups of rice with 2 raw eggs and 1/2 cup Parmesan. Put half the rice packed into the bottom. Make a trench and lay three boiled eggs. Sprinkle with 3/4 c shredded mozzarella and top with the rest of the rice. Top it all with 1/2c seasoned breadcrumbs. Bake at 400 for 30-35 min or till golden.
Meanwhile sauté some chopped onion in half butter and half olive oil till soft. Add 2 cups peas, 1 tbsp herbes de Provence (can you tell i love that stuff?), 1/2 tsp salt and cook for 5 min. Set aside and serve with your beautiful sformato di riso!

When baked just turn out onto a plate, surround with peas, and serve.

Tuesday, April 14, 2020

Spanikopita

Feeling creative? Try Spanikopita. It’s a finger-licker.


 Dia’s Spanikopita Appetizer

Ingredients:
One roll of phyllo dough, thawed (about 20 sheets)
1/2 lb cremini mushrooms, minced
2 tsp garlic powder
1 tsp each salt pepper
Good pinch cayenne
2 tbsp olive oil
3/4 c frozen chopped spinach, thawed, water squeezed out
3-4 sticks melted butter

In a medium saucepan sauté the mushrooms in olive oil till dry, about 5 min. Add spices and spinach and cook through. Off heat, add goat cheese and stir well till smooth. Cool and shape into 20-22 walnut sized balls.

Heat oven to 350 and prep a rimmed sheet pan w parchment. Melt a stick of butter in a small bowl. Melt more as needed. On another rimmed sheet pan (edges are needed to help contain the mess of the abundant butter!) lay out one sheet of phyllo as in pic. With a brush butter it well. Don’t worry about wetting every centimeter but you want a good buttered sheet.

Fold one side a third way onto the sheet as in pic. Butter.

Fold other side onto the first fold and butter again. Now you have a long strip of phyllo 1/3 the size of the sheet. Place a ball of filling at the bottom.

Take bottom left corner and fold over filling to the right edge to make a triangle and mash just a little to be able to fold easily. Don’t worry about tears in the phyllo just put it together and keep folding the triangle right and left up the strip (like when we passed notes in school or made paper ‘footballs’). At the end just fold the left over phyllo up around the triangle. Don’t try to tuck it in.


Make all your triangles and place together on the parchment sheet. Not much space needed between them as they don’t expand.

Bake 25-30 min or till golden brown. Remove w tongs to a paper towel and then to your serving plate. Can serve with a cool sour cream dip if desired (chopped herbs and salt are all that’s needed). Makes 20-22 triangles.
Buon appetito!
Dia


Monday, April 13, 2020

No Knead Half-Day Ciabatta

No Knead Half Day Ciabatta

You’ve heard of NoKnead Bread. Problem is, you have to think of it the night before to have ready by the next afternoon. I still make it, but with a family of more than 2 you probably want to make more than one loaf. What if you want sandwiches? Make ciabatta!

This recipe makes two giant loaves of ciabatta, enough for 8 meal sized sandwiches.

Let’s do it!

Ingredients:
6 cups bread flour
2 1/2 tsp salt
1/4 tsp dry yeast
3 cups very HOT water (not scalding-less than 130F)

Tools:
Parchment paper
Three long boxes or tubes for props (I use a rolling pin, a rolled up cutting sheet, and wadded up paper towels or a dish towel)
Either you need a large cookie sheet AND a 13x9 or larger metal pan
OR
You need a large metal serving pan with lid. I use this, actually a buffet serving pan with lid. They make these in aluminum and sometimes come with a lid too.

Total time needed start to finish: 5 hours

Mix all ingredients in a plastic bowl, just enough to blend. Note on the water temp: I use hot water from the faucet. It shouldn’t be unbearably hot but make it as hot as you can stand to the touch.
Cover with plastic wrap and a towel and let rise for 3 hours on the counter. No warm area needed.

After 3 hours, put your pans or pan and lid into the oven and turn on to 450. Then, flour the counter and scrape dough out onto it. Sprinkle the top with flour. Using a scraper divide into two pieces. Then, with floured hands, pick each piece up and gently shape into a kind of ball. Don’t press it or pinch it. Sprinkle with flour and cover with plastic wrap. Let it rest 15 minutes.

While it rests place your boxes or rolls on top of a large wood cutting board (for warmth), next to one another and then separate, spacing them parallel but about 5” apart. Now cut a piece of parchment for each space like a hammock for your bread. Make sure it’s about 24” long and wide enough to go past the sides of your boxes a couple of inches (to give space to grab it).  When your dough is rested, gently pick up and let its own weight lengthen the dough to about 24” and lay one in each of the hammocks. Cover with plastic wrap and a towel and let rise for an hour.

After the hour, WITH OVEN MITTS, remove the baking sheet or covered pan from the oven. Pick up one bread at a time and place them side by side in/on it. If using a covered pan, put lid on and place in oven. If using a baking sheet, put in the oven and pour 1.5 cups of water in the 13x9 placing pan under the baking sheet. Close the oven quickly.

Bake for 30 minutes. Then remove the parchment and bake another 10-12 minutes or until very golden. Let cool on a rack at least 15 min before cutting.

Don’t waste any leftover bread. This makes wonderful bread pudding!!

Buon appetito! Dia

Fancy French Meringues

I make these like my momma. She called them Forgotten cookies. Like meringues but we do it Texas style. Big, with chocolate and pecans added! And a great way to use up egg whites.

Yesterday I made pastry cream which requires 5 egg yolks. Thus, time to make meringues!
And today, I’m having meringues with my coffee! Mmmm.

You need
5 egg whites
1/8 tsp cream of tartar
1 cup sugar
1 tsp vanilla
1/8 tsp salt
1/2 c chopped pecans
1/2 c chocolate chips

Let the egg whites come to room temp. Then beat them with an electric mixer or beaters until very foamy. Add in your sugar a tbsp at a time until all added, then add the salt and the vanilla. Keep beating for 5-10 min. It takes awhile to dissolve the sugar and get it to whip up into stiff peaks. Don’t let it beat till the mixture looks dry.

Preheat the oven to 200 and prep a pan or two with parchment paper.
Fold in your pecans and chocolate.
Dollop onto the parchment. Leave a little space. They don’t grow so they can be close.
If you want them chewy inside you can make them giant 3-4” dollops. If you like them all crunchy leave them about 2” size.

Bake at 200 for 2 hours. Then turn off the oven - DONT OPEN IT! - and leave in for another hour.

Remove from the oven and let cool completely. Store in a sealed ziploc or plastic container and they’ll be good for weeks!

Monday, March 30, 2020

Flan. Creamy, sweet, the caramel flavor coming through leaving a nutty toasted sugar taste in your mouth. Beautiful for company and simple enough for family dinner. Make it in a loaf pan, deep cake pan, soufflé cups...

Ingredients for a 4 cup form (9" round cake pan or loaf pan)
Caramel:
3/4 c sugar
1/4 c water
In a light colored saucepan on medium hi put sugar and water, and stir only till combined. Cook until caramel color but not too dark, not stirring. If it smokes make it over again. Pour immediately in the form and swirl to coat bottom. Set aside.

Custard:
3 c half and half or 1.5 c cream and 1.5 c milk
3/4 c sugar
1/4 tsp salt
4 eggs plus 3 extra yolks
1 tsp vanilla
In saucepan on medium add the half n half plus about half of the 3/4 c sugar. Aside, beat to combine the eggs yolks salt and other half of sugar.

Meanwhile heat a large kettle or pan of water for the water bath, and find a casserole your form will fit in. Place an empty casserole in oven and preheat to 325. Must be large enough and y’all enough to set your baking pan in and water come up the sides halfway.

When milk is steaming but before it boils, remove from heat and whisk in the eggs, pouring really slowly in a thin stream and whisking like crazy so it doesn't curdle. When all the eggs are added, add the vanilla, and for extra creaminess pour it thru a sieve to remove egg bits that may have formed.

Open oven,
put the form with caramel in the casserole,
add your milk to the form,
and then add water to the casserole till it’s up the side of the form halfway or so.

Close oven and bake 30-40 min or till the custard jiggles just a tiny bit.
Take form out and Cool on a rack for 30 min, and in fridge 8+ hours more.

To serve, set out for 2 hours (lets the caramel thaw a bit), run a sharp knife around the edges, place a plate w a lip over your form and flip over all at once. It should drop out. If not just tap a little.

Mmmmm ... serve w whipped cream and strawberries if you like.
I make them also in jelly jars to take to lunch at work.
*I always double this and make in a le creuset 12 cup round, or in the ring pictured, and works great. Baked for about an hour or more when doubled!

Thursday, May 8, 2014

Chicken Tikka Masala

I do love ethnic food. Impromptu dinner plans with my cousin ended up resulting in a fun Indian style dinner. We made chicken tikka masala with rice, and I picked up a few sides at the local Indian grocery which has a hot food window. Here's the recipe for the masala. I started with a food network recipe and changed it some to my taste. 

Ingredients
Marinade and Chicken:
2 cups plain yogurt
2 tablespoons lemon juice
1/2 tbsp cayenne pepper
1 tablespoon ground cumin
1 tablespoon minced fresh ginger
1 tablespoon ginger juice
2 teaspoons ground cinnamon
Salt
1 teaspoon pepper
2 pounds chicken thighs, cut into bites
Sauce:
2 tablespoons butter
2 tablespoons minced garlic
1 tablespoons minced  jalapeno
1 teaspoon ground cumin
1 teaspoon sea salt 
1 teaspoon smoked paprika
2 cups tomato sauce
1 cup heavy cream
1/2 cup yogurt
Chopped green onions and cilantro, for garnish
Directions

For the marinade and chicken: In a bowl, blend the yogurt, lemon juice, cayenne, cumin, gingers,cinnamon, salt as needed and pepper. Once well mixed, add the chicken and allow the meat to marinate covered in the fridge for 30 minutes. Do not over marinate because it gets really spicy. You can cut the cayenne back as desired but this dish is meant to be spicy.

For the sauce: Melt the butter in a large heavy skillet over medium heat. Saute the garlic and jalapeno for 1 minute. Season with cumin, salt and paprika. Stir in the tomato sauce, heavy cream and yogurt. Simmer on low heat until the sauce thickens, about 20 minutes.

In a nonstick (very important) wok or deep rounded skillet, which you have heated on high, cook the chicken in small batches on medium high to high heat on each side for 2-3 minutes. It's important to put just enough chicken to cover the bottom of the skillet, moving so each piece is on the bottom, and let sit to brown. Don't keep stirring. Then when browned stir and flip and let sit and brown again. 

Once cooked, add a couple spoonfuls of the prepared sauce. Allow the sauce to cook for 15-20 seconds on high heat and then place in serving dish. Continue with more batches till all the chicken is done.  Garnish with mounded chopped green onion and cilantro. Serve plated over rice, with a couple spoons of sauce on top. 

Dessert tonight wasn't exactly Indian. Boston Cream Pie Cupcakes. Mmmmm. But that's okay. Eclectic is the best cuisine I know. 

Sunday, January 19, 2014

Glorious Pot Pie

Most pot pie recipes are 'how to use up leftover baked chicken' recipes. Well, I didn't have any and I wanted pot pie, so this is a 'from scratch' pie. 

Don't be discouraged by all the different parts of this tome. You could always substitute shortcuts and I'm sure it'd be just fine: refrigerated pie crust for homemade, leftover chicken for my poached chicken, frozen chopped veggies.  But that said, let's dive in. 


Glorious Pot Pie
Makes one 9" pie and two mini pies. The 9" pie serves 5 easily, maybe 6. 

The crust, cuisinart method 
2 1/2 c flour, 1/2 tsp salt, stick butter, ice water

In a cuisinart food processor with metal blade put 2 1/2 cups flour and 1/2 tsp salt. Pulse to blend. Add a stick of butter you've cut up into 6-7 pieces. Pulse until the butter is cut into tiny pieces, and in a cuisinart they're invisible. Change blade if you like to plastic dough blade and pulse while you add in 1/2 cup or so of ice water..just until the dough starts to make clumps.  Take off lid and see if it'll bind when you squeeze it. If not add a bit more water. Dump out on floured board, mash into two balls, cover with plastic wrap and pop in the fridge. 

The filling. 
4 small chicken breasts or 3 larger
1 cup diced fresh carrots
1/2 c diced celery
1/2 c frozen peas, rinsed and drained
1 c corn niblets, rinsed and drained
2 potatoes, peeled and diced
3/4 c white wine
Garlic powder
Savory, or herbs de Provence, or whatever you like. 
Salt n pepper
3 c chicken broth
Flour
1/2 c milk
1 egg white

Cut the chicken flat ways so you have twice the number of thinner fillets. Sprinkle salt and garlic on the chicken breasts, then rub with a tablespoon of flour...just till the chicken is lightly coated. Do both sides. Heat a very large skillet on medium high and add a drizzle of olive oil and your chicken. Cook chicken just to color, and remove to a large dish. 

Add more olive oil as needed and add carrot and celery. Sauté for 7 minutes. Remove to the same plate.  Add the white wine and scrub up all the brown bits. Let cook a minute to remove alcohol and then add the chicken broth. Add back in all the chicken, veggies, and the potatoes too. Add a tsp salt, a tablespoon of dried herbs, and bring to a boil, reduce to medium and simmer uncovered for 7 min, or until the potatoes are cooked but still very firm. 

Remove everything with a slotted spoon to that plate, and pour your broth into a saucepan or bowl (I made broth with water and bouillon so I put it back in that pan). 

The sauce. 
Now in your dry pan, on medium, add 3/4 stick of butter and melt. When melted add 3/4 c flour and stir to absorb all that butter. Cook, stirring around a bit, for 3 minutes. It'll coat the bottom but don't worry. Now take off heat and add in your broth again. It'll really bubble. Put back on heat, whisking, removing all the bits from the bottom. It'll be ready in just a minute or so. When starts to be thick remove from heat. Add a good bit of pepper and taste for salt. Whisk in the milk.  
Dice up your chicken now  

Assembly. 
Roll out one ring of dough to fill a 9" pie plate. Extra edges can be used to cover the mini pies. Put dough in a glass pie plate and cut off edges at outside rim of plate. Now put in COLD oven. Then turn on to 375. When oven dings that it's ready take pie plate out. Whip the egg white a little and brush bottom with egg white to seal a bit. 

Roll out the second piece of dough to cover the pie. Have ready.  

Mix the corn and peas into the sauce first to warm. Then add your veg and chicken. Take a bite to check for salt and pepper and adjust. Then pile into the pie plate. Extra can go into the mini pies. Or into muffin tins lined with extra dough. 

Cover with your other round of dough and pinch over the edge of the plate so it doesn't shrink. Brush with egg white and cut a hole in the center. 

Bake at 375 for 40 min or until browns and bubbles. Mini pies cook about 30 min. Let it really brown well. The bottom crust will be a little less brown than however the top is. 


Let set up a few minutes before cutting but it'll cut great and be servable with a pie server since you have that nice firm crust. 

Quick recipe:
1. Make two pie crusts
2. Brown chicken, then sauté hard veggies. Remove all and deglaze with white wine. Add broth and poach chicken with hard veggies and potatoes 7 min. Remove. 
3. Make a velouté sauce using the broth. Add milk when done.  Mix in all filling. 
4. Line plate with dough, prebake 5 min. Then brush w egg white, fill with filling, cover and bake 40-50 min at 375. 


Friday, January 17, 2014

Marmalade from Texas citrus?

Many would scoff at the notion of making marmalade from any orange except THE marmalade orange, the Seville. 

I don't have a Seville orange tree. I have a Texas Satsuma tree, and I'm not even sure of the actual variety. I do know that I hope it never dies. It's hardy, no thorns, and makes hundreds of pounds almost every year. 


My satsumas are wonderful. Thin skin, peelable with one hand, no seeds except for the 1 in 100 rebel that has 2-3, and super sweet and juicy. Can't beat them. But I've always been told they won't make marmalade.  Too juicy. Too thin of skin. .....


Then I married this Sicilian guy who told me that his family made marmalade out of every type of citrus grown on the island. The light bulb went on. And here I am making marmalade from Satsumas. 

The trick is doing it the old fashioned way. No timer. No thermometer. Just cooking and testing till it's done.  VERY IMPORTANT is to use organic unsprayed oranges. After all, you're eating the peel!  If you know they're organic but don't know about the spraying (as in you bought from the store), soak them in water with a half cup of white vinegar for an hour, scrub and rinse. 

Satsuma Marmalade 
Makes approx 9 pints 

4 kg organic clean satsumas (10lbs): 
*optional add 1 lemon per kilo for a change of taste. Yummy...
2400 gr sugar
1/2 -3/4 c water 
Jars, lids and rings 

You can halve this recipe for a first run and it still works great. 

In a large heavy bottom pot, dump in sugar and make a space in the center with a wooden spoon. Add the water and little by little stir in the sugar till it's all wet. Be patient and it'll happen. Then turn on the heat to medium and stir once in awhile. Cook till the sugar is dissolved. 


Meanwhile your fruit should be scrubbed and clean.  Slice each orange in half horizontally like this 


Flick out any seeds and set cut side down on a cutting board. With a sharp chopping knife slice in thin thin slices, rind, pulp and all.   


I like it really about 1/4" thick. Remember that they'll be staying about the same size in your marmalade. If you don't like the length of the strips you can cut them all in half, in the above photo it's just one more cut vertically. Cut them all, putting together with juices from the board into a bowl. 


When you're done cutting them all up, dump into your sugar. It doesn't have to be completely dissolved but if it dissolves before you're done, take the pot off the heat till you can put the fruit in. 

Mix in your oranges and poke down so that they're all sugared. 


Put on high heat until it comes to a boil, and then turn down to medium. It should stay at a nice medium boil (not a simmer or you'll be there all day). Boil for two hours, stirring every 8 minutes or so. I set a timer a I don't forget. 

Put a couple of saucers in the freezer if you haven't already and let freeze. Also wash your jars and set on a tray in the oven on 250. Put the flat lids in water in a saucepan and boil for a few minutes, then turn off and leave there. Your rings should be handy and if you have a wide mouth funnel for cleaner spooning in of marmalade have it out too. Lastly get a bath towel, fold in half, and lay on the counter off to the side (to set up the jam overnight). 

Your marmalade is looking like this 


Darker and more syrupy. After two hours, take a plate from the freezer and put a teaspoon of syrup in the center. Let sit a minute or two and then turn sideways. If it all runs off you need to cook it more. If just a drop runs out slowly you're ready. 

Take your jars out and set next to the pot, off the heat. Turn lids on medium and have tongs to get them.  Get a damp paper towel ready too.  

Using a hot pad, pick up a jar your with wide mouth funnel in it.  Spoon it full of orange bits, up to where the threading starts, and then fill in spaces with syrup. Leave that 1/2" threaded section of jar unfilled.  Wipe the rim with the wet paper towel, put a lid on with tongs, screw on the ring (not too tight), and invert on a towel. Yes upside down. When you've filled all the jars, fold the towel over the jars and tuck in to keep warm. 


Leave the jars there for about 90 minutes, then turn right side up and cover again. Let set up covered for about 8 hours or more.  All the lids should have popped down indicating a good seal. 

Now you can rinse off the sticky bits and store in the pantry. If you don't like the consistency you can either wait 2 weeks to see if it sets, and it does, or open those jars and cook some more. There is not enough syrup really to be runny and we love a little anyway on our bread, so a bit runny for us is fine. 


Not much else to say, except you can do this!  Once we learn the method behind our recipes we can learn to make adjustments to fit our circumstances. Some fruit is juicier than others, has more pectun, was picked longer ago...all these factors change how jelly sets up. I've cooked this marmalade between 2 and 3.5 hours depending on just the freshness of my satsumas. But it turned out each time wonderfully. Let me know how yours comes out! 

Friday, January 3, 2014

Citron is a fruit

This fruit has always frightened me a little.  I'd see these lemons that apparently were from Land of the Lost, bigger than a cantaloupe... 
They measure across about 6", with the white pith being around 1.5" thick and a little ultra sour lemon center. 
Cutting a slice of this monster, remove the peel leaving just the pith and lemon. Then slice up so that you have a good chunk of pith and only a taste of that sour lemon. And eat. Yep, the pith too. It's actually sweet! It tempers the lemon and makes for a refreshing snack. 

There are kiosks around Sicily that sell primarily this fruit with a sprinkling of baking soda as the ultimate foamy refresher in summer. I'm told it's true but I don't think I have the courage to eat that foamy sour thing. 

Have you ever looked in the candied fruit section of the baking aisle? You'll see lots of candied citron. This is that fruit. It really is wonderful candied, and not too shabby fresh. If you see one in the grocery maybe take the plunge! Now you know what to do with it! 


Sunday, December 22, 2013

L'Aperitivo

There are certain little things I just love about italy. It's all about the details. 

Fresh panettone stuffed with Grand marnier cream, wrapped in beautiful paper...stepping into a bar for coffee and being greeting with BUONGIORNO! by strangers....driving on the autostrada during a major soccer game and cars blocking the toll booths to be able to hear a key moment in the game, (no reception under the booth) and no one caring...the list goes on. 

Paternò is famous for bar-love. Every corner in our town has a bar... or two. The bar is the center of social interaction outside the home.  People have their favorite bars, favorite baristas, favorite specialties. Some bars specialize in 'dessert', which are soft butter cookies dipped in chocolate or with added nuts or candied fruit. Some specialize in savory treats like cartucciate (puff pastry with tomato sauce, ham, cheese and olives), arancini (fried rice balls stuffed with everything from eggplant Parmesan to meat sauce to ground pistachios and cream), fried stuffed olives or mini pizzas. Some make cakes or tortes or ice cream. My favorite bar, Bar Elios, is minuscule, and makes the absolute best almond paste cookies...melt in your mouth...and in cool weather makes the raviola, a puff pastry pocket with homemade ricotta, sweetened with a bit of sugar and cinnamon or cocoa. He makes the best pistachio arancini and smoked salmon cream arancini too,.. I could brag all day about Signor Pippo and his talents. Moving on! 

The other day my brother-in-law picked me up so we could get our girls at school together and catch up. We stopped at a bar he prefers, to kill some time and grab a drink.  This bar wasn't impressive on the outside, and upon entering (after the BUONGIORNO!) I note a small gathering of people watching a tv screen. It's the Lottery crew. Watching the numbers. Two old women, a young man and a little girl. Fixed on that screen. 
We approach the bar, browse the very few offerings of pastries, and decide on just 'l'aperitivo'. We choose 'analcolico', non-alcohol. Sitting down at a tiny marble table I see the 'dessert' case. Three levels high, about 10' long, packed with trays of every dessert cookie I think I've seen. This is apparently their specialty. Giant 2'x3' wicker baskets are piled in the corner, waiting to be filled with Spumante or Prosecco, wrapped panettone and dessert cookies. And here comes the barista. 

He brings us two American style glass water glasses, filled about 2/3 up with a neon orange liquid and a slice of orange floating at the top. He brings a tray of salatini, or salty snacks, and a plate of four mini pizza bites. Not bad. Nice bonus, I'm thinking. Toasted hazelnuts, tiny spicy rice puffs, chips, peanuts and more. What a treat. It's the little things. 

The aperitivo is not sweet, not sour, it's almost bittersweet. Kind of like eating an orange peel. Strangely enjoyable. You've seen those tiny triangle shaped red bottles I'm sure. That's this. It piques the appetite, prepares the stomach for eating lunch, starts the digestive juices flowing. There's method in the madness. 

We drink, and talk, and snack, and talk. The bar fills and empties four or five times, glasses clinking and coffee saucers sliding back and forth across the marble. A young woman comes in along and the ocean of men parts to let her reach the bar, quickly down a coffee, and depart. A deaf man comes in to follow his apparently daily routine, signs to the barista and is served with a smile and a nod. More lottery crew come and crane their necks to watch the numbers. I could sit here all day. 

This week why not pick up a little pack of these Campari aperitivi at the store and serve chilled with some little snacks before dinner. Add your own little something special. 


Friday, December 20, 2013

Bucatini all'arrabbiata

Bucatini?  What in the world? Imagine rolling dough out, and then around a piece of straw. Pull out the straw and you have bucatini, or spaghetti with hole.  They're found in Italian specially stores and sometimes at gourmet grocers. Personally they're not my favorite just because they're hard to cook al dente. Here's the trick though to getting it perfect. . 
Bring your salted water to a boil. Read the package for number of minutes to cook.  Pour pasta into boiling water, stir, cover, and TURN OFF FIRE. Yep. Turn it off. Set the timer and when it dings you'll have perfect pasta. (Don't peek by the way). 
This is such a great system.  Saves electricity, saves steam and heat in the kitchen, and cooks your pasta perfectly al dente all the way through every time. Pastas like bow tie and bucatini especially need this because they tend to cook more on the outside and less at the center. Try it and see how you like it! 

Tonight we picked up some red pepper bucatini from a cousin's fresh pasta shop. I think they're cousins anyway. We are related to half the people in the area somehow. Bright red swirls of thick round pasta. Just too hard to resist. Got some fresh ricotta and spinach ravioli too. Mmm. I think Sunday we will come get their broccoli and almond stuffed orecchiette, or maybe their pistachio and ricotta pasta. Just yum. 

Anyway, my daughter wanted to cook for me, and since I'm fighting some congestion, she said I needed spicy. We stopped and got a fresh, long, spicy pepper, a can of tomato 'pulp', and two eggplants. €4. About $5.50. With €2 for pasta we were at $8 for dinner. Nice. 

Annemarie's Bucatini all'arrabbiata 

In a saucepan heat on medium hi about 2 tbsp olive oil. Slice  1" of the hot pepper into circles. Crush a clove of garlic with the side of your knife. Toss all that in the oil. Don't put the pepper seeds. 
Cook on medium hi for a few minutes and put your pasta water on to boil. 
Add a 14oz can of tomato pulp, or polpa. Kind of like our crushed tomatoes. Add a tsp sugar and 1/2 tsp salt. Cook on medium hi semi-covered for five-ten minutes to reduce the watery liquid down. 

Slice eggplant into 1/4" slices and brown in a skillet either dry or with a little olive oil. Salt each side. Cook till soft and brown. Set aside. 
When salted pasta water boils dump in pasta, stir, cover, turn off and set timer. Don't open the lid at all till timer rings. 

Taste sauce for salt or bitterness. If bitter add a pinch of sugar. 
When everything is done, pull your bucatini out of the water and put right into the sauce. Toss together. 
Serve topped with grilled eggplant, some crusty bread, and we like it with some fresh arugula on top. A little grated ricotta salata cheese goes perfect too. 
We ended the meal with cheese and some buttery pears. 
My congestion cleared right up, by the way. Just what the doctor ordered! 


Tuesday, November 19, 2013

Italian Meatball Soup

This is a 'whip-it-up-quick' meal. Have an onion? A few carrots? A half pound of ground beef?  You have the makings of one of my family's favorite meals. 
We love eating this when we've been eating out a lot, or have been traveling, or any time we want something to soothe that tummy. Even with the onion and beef in the ingredients it manages to set your system right. We learned to make this from my sister-in-law Daniela in Sicily. She would have this treat hot and ready to eat each time we arrived for a visit. Wonderful after that long plane ride. 

Italian Meatball Soup
Feeds 5 adults
Work time: 10 min
Cook time: 20-30 min

5 carrots, peeled and cut in bite sized pieces. 
2 onions, roughly chopped
*also good are sliced mushrooms, frozen corn, celery, etc
1 lb grass fed ground beef
1/2 c Parmesan
1/2 c bread crumbs 
Garlic powder
2 bay leaves
Pepper
Oregano
Salt
Cayenne pepper
Worcestershire sauce (optional)
Rice or 1/4 lb broken spaghetti (optional)

Fill a soup pot with about 3 quarts water and set on high heat. Add hard chopped veggies. Save any soft ones you want to use for later. Mix meat with Parmesan and bread crumbs. Add a couple tbsp milk or water to soften. Add 1 tsp salt, 1/4 tsp pepper, 1 tsp garlic powder. Mix well. Form 1" balls, packing firmly, and drop in the water as you go. If using rice, add 1/2 c at the same time as the meat. 

Now add 2 bay leaves, 1/2 tsp pepper, 2 tsp salt, 2 tbsp oregano. Bring to a boil, reduce heat and cook for 30 min, skimming off any foam. Add those soft optional veggies about 15 min into cooking, and 5 minutes before serving add a few dashes cayenne and taste for saltiness. You can add Worcestershire to the meatballs when makings them, or the broth at this point. It's good with or without it. 

It should taste peppery and flavorful. 
We serve it with Parmesan on the table, bread we've opened and toasted for extra crunch, or you can cut up bread in cubes, toss in a ziploc with a drizzle of olive oil, a handful of shredded Parmesan, and a sprinkle of salt and pepper, shake well, then pour on foil and broil in the oven for amazing croutons. 

Serving this to unexpected guests the other day, my son in college texted me and was instantly wishing he were home to join us!   By the way, I did say use a pound of meat. If you don't have it, no worries. Half a pound is just fine. Make smaller meatballs and add rice or broken spaghetti (add pasta in the last 10 minutes). Enjoy!

Monday, July 8, 2013

Peanut Butter Nutella Crostata

When I visit Sicily I am pressured to bring a supply of peanut butter. It's something that, for some reason, has never taken off over here. I'm surprised because a jar of peanut butter lasts about 3 days when I open it here. They love it. So, after a week of cobblers and crumbles with lots of fruit, my sweet nephew Simone asked me, 'Zia, PLEASE can you make me something chocolate?' 
Of course. For him, anything. Ever seen those Italian paintings of child angels? Well they were drawing him. Just angelic in face and heart, even at 9 years old. Sweetie. 
I started to make him a Nutella crostata and decided to throw in a surprise of a layer of peanut butter. Yum. 

Ingredients:
1 Stick of butter /120gr
100 grams sugar
1 3/4 c flour / 200gr
An egg
1/3 c smooth peanut butter
300gr Nutella 
Extra flour and sugar

Preheat oven to 375. 
Line a 9" round cake pan with aluminum foil or parchment so it sticks out on four corners--- easier to remove your confection to place on a plate and serve with coffee! 

Mash in a bowl with a fork, a stick of butter and 100 grams of sugar. Just weigh it.  Mix in an egg. Add 1 3/4 cup flour and mix in. 
Dump out on a floured counter and roll out. It'll stick to the pin and counter. Just flour the pin. It should remind you of sugar cookie dough. When it's about double a pie crust's thickness, stop. Using a knife cut a circle 1" larger than the base of your cake pan. (set it on top.) 
Use a spatula to scrape under the circle and roll it up on the pin to transfer to the cake pan. Press in and up sides about 3/4". 

Take about 1/3 c smooth peanut butter and add a tbsp of sugar and a tbsp of flour. Mix well and spread on the bottom. 
Then pour about 300gr of Nutella into a bowl and add a tbsp flour. Mix in and pour over the peanut butter. Spread out. 

Now use the extra dough to make a lattice, make hearts, whatever. Paint with an egg wash and sprinkle with sugar. 

Bake for 25-30 minutes or until the crust is browned. You can dust when cooled with powdered sugar. Remove from pan and peel foil or paper from the bottom. Serve cooled. 

Thursday, July 4, 2013

Cherry Plum Cobbler with Ricotta Cream

Part of eating healthy is of course eating seasonal, ripe, fresh, and local. If you want fruit in Sicily at a decent price, actually at ridiculously low prices, eat seasonal, fresh, ripe, and local. For example, the cherries and plums I bought for this were either free or $1.35 per kilo (2.2 lbs)!  The cherries are from Etnas 10,000 feet of mountain. So so good. 

So anyway, I'm teaching them a little about southern cooking. They LOVE cobbler. I don't get why their cuisine doesn't have this, but it doesn't. Lots of crostatas, which can be dry, and dry isn't nice in summer like cobbler with ice cream, now is it! 

I made two of these, in two 9" cake pans. One for each of my sisters in law. One upstairs and one down. They were a huge hit, as I adapted them a bit to their taste. My family here doesn't like vanilla ice cream. Yes it's weird. And I about died when they put chocolate ice cream on my peach cobbler, since they don't like vanilla. Ugh. So I adapted. You'll love it. You can do this in a 13x9 pan as well for a larger or hungrier group. Just don't divide anything!

Cherry Plum Cobbler with Ricotta Cream
1/2 c butter, divided 
1 cup flour
1 cup sugar
1 cup milk
Pinch salt
1 tsp baking powder
1 egg beaten
1/2 tsp vanilla or almond extract 

1/4 c strawberry or other jam
1/3 c sugar
2 tsp cornstarch
Two cups pitted fresh cherries
Two cups sliced plums. I used the slightly mushy yellow ones and it came out gorgeous and yummy. 

1 c ricotta cheese, the wetter the better
3-4 tbsp sugar
1/2 tsp vanilla
2-3 tbsp milk
Lemon zest optional. 

Mix the cherries and plum pieces in a bowl. Add 1/3 c sugar and 2 tsp cornstarch and mix. Add the jam and mix. Set aside 30 min to macerate and make all those wonderful juices. Add lemon zest if desired. 

When time is up, heat oven to 350. 
Put 1/4 c butter in each pan and place in oven as it heats. Meanwhile, mix dry ingredients for the cobbler in a bowl, then add the milk, extract and egg, and mix. Set aside. 

Your butter should be just melted. Take the pans out when it's melted and pour half of the batter in each pan on top of the butter. Yum. 
Now spoon the fruit evenly over the top of the batter. DON'T STIR PLEASE. The batter will rise up and make a pretty and tasty treat. Lastly spoon the juices over the two pans. 

Place in oven and bake 50-60 min, rotating the pans halfway through to bake evenly. They're done when the edges pull away from the sides. 

To serve, mix the ricotta, sugar and vanilla in a bowl well. Get the lumps out. You can even whisk it. Then add a bit of milk and stir in till the consistency of homemade whipped cream. Kind of plops when you dollop it. 

Serve each wedge with a dollop of ricotta cream. It's as good cooled as warm. This would be great with ice cream, but as I said, it would have to be vanilla. Can't get the Sicilians to eat vanilla ice cream, but put ricotta in and everyone is on board!  Buon appetito!


Saturday, June 29, 2013

Sgombro con Salmariglio

Summer in Sicily is normally soooo hot but not this week. Enjoying sun and cool breezes. 

Lunch's main course this day was mackerel, a bluefish perfect for a light meal. My sister in law met up with the fishmonger and he recommended making it into a cold dish. Easy and tasty. We accompanied it with sautéed green pepper strips, eggplant, and cherry tomatoes, and a salad. Ended with bread and cheese. Fantastic. 

Whole mackerel here are tiny fish, about 6-8" long, and our fishmonger cleans them. Of course they shouldn't smell at all or be slimy.  Mackerel have skin and no scales so are perfect for quick cooking. 

Lay the fishes in a pan and barely cover with water. Add a teaspoon of salt, a little dried or fresh mint, a few fennel seeds, and bring to a soft boil. Reduce and simmer for 30 minutes. Remove the fish, let cool a bit, and gently split into filets and remove bones. Place fillets on serving platter. 

Salmariglio is the standarddressing for   Italian meats and fish.  Chop a large bunch of fresh parsley, add to this the juice of a lemon, a little zest as well, about 1/4 c of olive oil, a teaspoon salt and a couple cloves of crushed garlic. Mix well and gently dress fish. Let sit while you prepare your side dishes and serve room temp. Decorate with a few sliced cherry tomatoes. 

This made for the perfect meal to eat with the balcony doors open wide and the breeze keeping us cool, and a little naturally effervescent water from the tap, bubbly thanks to our local volcano. Perfect. 

Friday, June 28, 2013

Peach Cobbler a la italiana

Ok ok so peach cobbler isn't Italian. It should be. It has all the required characteristics of an Italian dessert. Not too sweet. Fresh fruit. A lemon. Oh and gelato. I made some last night. And now all my sisters in law are making it. 

This cobbler was really easy and I eyeballed most of the ingredients. So here's the eyeball method. 

Preheat oven to 425F or 200C. 
Take a round 9" cake pan and fill it with chunked up fresh peaches. Here, if you want fruit, it had better be in season. Besides bananas and pineapples, the only fruit around is in season and local. Right now it's cherries, fist sized figs, and peaches. The flat ones. I had never used them since in the states they're unripened and smell nasty where I live. Here they're perfect. Of course, because they're in season. 

I filled the pan with about 8 large flat peaches. I just cut them in wedges about 1/2" or less thick. 
Add 1/3 cup sugar
A heaping teaspoon cornstarch
The zest of one large lemon and its juice 
1/2 tsp vanilla or almond extract. Or none if you don't have any. No big deal. 

By the way, I have a new zest theory. We waste so much wonderful lemon zest using that little zesting tool. I use a sharp knife and just cut off the yellow. Make sure what comes off is yellow on both sides. Then cut in tiny zester looking strips. You get a TON of lemon zest, and because its cooked in sugar, it's a pleasure to find a piece now and then. Just my two euros worth of opinion. 

Ok so put this pan in the oven for 12 minutes. Or 15. Doesn't matter. Meanwhile make your dough. So easy. 

Mix a cup flour
Half a cup sugar
A heaping tsp baking powder
Two BIG pinches salt. Blend a little with your fingers. 
Add a stick of cold butter that you've cut in little pieces. Smoosh now into the flour over and over bit by bit until its all flaky. 
Now this is the weird part. Heat some water till really hot. Drizzle it into the flour, about a tbsp at a time, and fluff with a fork. Keep adding just until the dough comes together. Stir a tad to
Wet everything, and then dollop on top of the hot peaches. It'll probably cover it but don't worry if it doesn't. 

Pop back in the oven about 30 minutes or until brown and bubbly. Done!  This needs to be warm or hot even when served. And must be with ice cream. Over here vanilla is rare so we use fior di latte (the flower of the milk I.e. cream), or panna (cream). Any which way it works. Last night the little ones were asking for seconds. Should've know better than to make one pan for 11 people...


Wednesday, June 26, 2013

Italian Street Food

I'm sure many things come to mind if you imagine Italian street food. Particularly from a food truck. Well, what we imagine probably is nothing like what they serve up in Catania. 
They are sandwich trucks. Behind the counter you see rotisseries with golden chickens, trays of potatoes roasting underneath them, catching all those food juices, ... And a grill for hamburgers and hot dogs. 
They love hotdogs. Theirs don't have all the nastiness that comes to mind when we think of hotdog ingredients. They're so tasty. 
They're split down the middle, grilled,  and lain on a split Italian hard roll. Then you have your choice of toppings. 
Those are behind the glass. Behind the glass are probably twenty different toppings in shiny flat oval shaped plates. You have no idea what they are but it's really interesting watching a 9 year old boy point out all the unusual vegetable and meat toppings he wants on his hotdog. 
The standard though is:
Bread, hotdog, a pile of French fries, a good squirt of mayonnaise, and a good squirt of ketchup. Set in a paper boat, or wrapped in foil, and there you go. Yum. Take a bite with all those things in it. Messy and good. 
Better still is my nephew's favorite: 
Bread, hot dog, mustard, salsa capricciosa (pickled julienne carrots and cabbage in a mayonnaise sauce), whole kernel corn, French fries and sometimes ketchup or barbecue sauce. (Pictured here)
Other toppings (yes, ON the hot dog) include: eggplant Parmesan, tuna sauce, shrimp sauce with baby shrimp, aurora sauce, grilled steak rolls with provolone, and of course lettuce tomato and onion. 
The sky is the limit here. Grab a coke or an aranciata (fizzy orange juice...NOT a Fanta) and you're set for an evening out, maybe by the Mediterranean with the lights shining on the cobblestones. 

Saturday, June 22, 2013

Linguine with Wild Fennel Weed

This is one seriously Sicilian dish. Wild fennel weed that must be picked wild, preferably off a mountain like the volcano Etna.....then a quick run by the fish market to get some little fish. Almost any kind will do. The most used would be a blue fish. You could use mackerel, or fresh sardines too. Best bet is go to a Chinese market and find some fresh or frozen tiny fish. They love fish as much as Sicilians do. 

These two ingredients make for the perfect summer pasta dish. Light and nutrient rich, with a nice crunch to boot.

1 lb linguine
A fist full of dill weed with stalks
An onion
2 salted anchovy fillets finely chopped
1/2 c pine nuts
1/2 c raisins
4 peeled tomatoes or 1 c diced tomatoes

1 1/2 c breadcrumbs
1 lb little fishes

Fill a pasta pot with water and salt as for boiling pasta. Take your fennel weed and put it right in there. Let it boil 20 min. I think we could substitute fresh dill weed. Has to be fresh and not dried. Put a whole bunch in. Let it blanch and then pick it out and let drain. Keep that dilly water for the pasta. 

Chop the dill up nicely and add to a skillet with one grated onion and 2 tbsp or so of olive oil. Sauté all that for a bit. Throw in some everything else including  pine nuts and / or raisins if you have them and sauté together. Add a bit of dilly water to make saucy. Squish the tomatoes and they'll disappear. Sauce shouldn't be red. 

Your little fishes should be cleaned and have no scales but still probably have bones. It's up to you to decide whether to filet or not. However you decide, toss in the fish and sauté away. When the fish is done, set it aside. They might fall apart and it's ok. Salt to taste. 

In another skillet toast some plain breadcrumbs. Put a bit of olive oil in with a crushed garlic clove and sauté. Add the breadcrumbs a with a little Parmesan. 
Like 1/3 cup per person. Make them nice and golden. Just set the skillet on medium high and stir every so often. Put them in a bowl for the table. 

Now boil your pasta in the dilly salted water, and strain, saving some pasta water for the table.  Toss in with the fish sauce and add pasta water as needed to make it come together. 

Serve each plate with a nice sprinkling of breadcrumbs and some Parmesan if desired.  It's crunchy and fresh and healthful. Dill weed is well known for its healthful properties and so are tiny fish :)

**In our family we actually fry the little fish fillets separately and put on top of the pasta. It's a little drier to eat but we like it. Just dredge the fillets in breadcrumbs and fry in a little olive oil. Salt to taste. 

Wednesday, June 19, 2013

Caffè al bar

Having time to kill in the Italian airports means coffee at the bar. Sidle up to the cashregister  and state your preference... In Naples today for me it was a caffè macchiato...espresso with a little stain of lightly steamed whole milk. 1€. I hand him a €5, slide my coins out of the change dish, which is a beautiful custom made Italian ceramic plate with the bar's name painted in royal blue with gold flourishes, along with the required receipt. Proof you have a right to that caffè.  
Now to maneuver to the bar somehow. If you're Italian, coffee drinking isn't the long sipping and chatting exercise we participate in. Your job is to produce the receipt, order your drink, drink it and leave a space for the next person. Sounds simple. It isn't.  
A spot vacates and I move in. Casually holding my receipt just above the counter level, not to seem too anxious, I wait for the barista's glance. He's wearing a traditional uniform, short sleeved white cotton dress shirt, a vest in royal blue, a red bowtie, and a royal blue hat that reminds me of the ice cream scoopers from the '50s. His eyes glance at me and he smiles from down the bar, and when he is halfway to me I mutter, "macchiato". 
He grins, swiftly grabs three stylish, tall, thin glasses with three of his fingers, runs them under the bar sink faucet and fills them halfway with water from the sink. It's a fizzy water, naturally, as we are in a volcanic area. He puts a glass before a flight attendant, a pilot, and then flips it upside down and places one in front of me without spilling a drop.  "Bella signora, vorrebbe qualcosa da mangiare oggi?" ...pretty lady, would you care for  something to eat? He smiles again, flashing those black neopolitan eyes, and starts making our espressos. 
Why the water? To clean your palate, of course! I drink mine, tasting the minerals and feeling the amazingly fine bubbles clean my mouth. By the time I'm done, so are the coffees. 
It's served in a warm cup, with the name of the coffee in the ceramic. I add one bag of sugar, it floats for a second or two and falls through. Yes it's a good coffee. I stir, then pass the back of the tiny spoon over the rim where il'l drink, to flavor the cup. Who wants to taste a ceramic cup? Then take it in, usually in three or four good sips. Done. Before I can put the cup back, my barista is back asking if it was buono... It's coffee at a bar in italy. How could it not be anything but incredible? And for me it was much more. I was 'commossa''. Moved...it was like they'd been waiting for me to come home.